Congratulations on your new staircase! We hope that you are delighted with the results. Now that it’s been installed, we’d love to show it off in our online gallery.
The information below will help you take the best possible photo of your staircase, ensuring that it’s captured in its best light and that the size and format of the image will display correctly on our website.
5 picture-taking tips
⦁ Landscape, not portrait – Taking pictures in landscape mode will help make sure that the stairs can be clearly seen. Wider images work better than tall ones as cropping will occur when photos are published on our website.
⦁ Bigger is better – Ensure your images are at least 1920x1080px in size to avoid pixelation and blurriness. A bigger photo will clearly showcase the high-quality workmanship and attention to detail in your staircase, which would be lost in a smaller picture.
⦁ Let there be light – There’s nothing worse than a dark, grainy image. The same staircase can look small, dark and uninviting or light and airy with every detail on show, simply depending on the quality of the light. Ensure that the light source is behind you or that the room is well-lit and the camera flash is in auto mode.
⦁ Keep a steady hand – Holding the camera steady will avoid any blurry images and enable people viewing the website to see all the details of your stairs clearly. You have a great looking staircase so you’ll want to show it off with a clear picture!
⦁ Two sides to every story – Take shots from different sides of your staircase and from a slight angle to show off all of its bespoke features. Take a look at the following examples for inspiration:
Make space
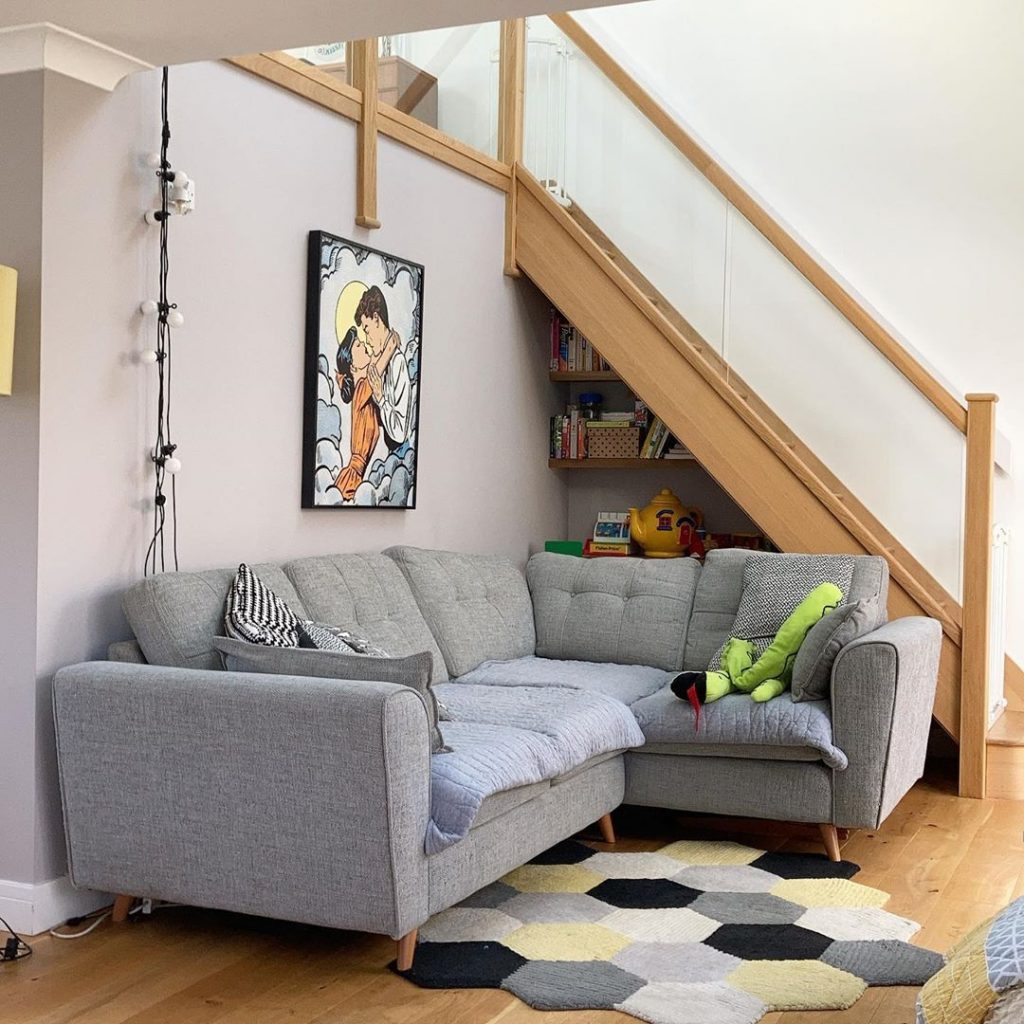
Standing back and capturing some of the room that your staircase is in, as well as the stairs themselves, will help show how the staircase fits into the space and works with the rest of your home. Moving any clutter out of shot will also ensure that all focus is on your stunning new stairs.
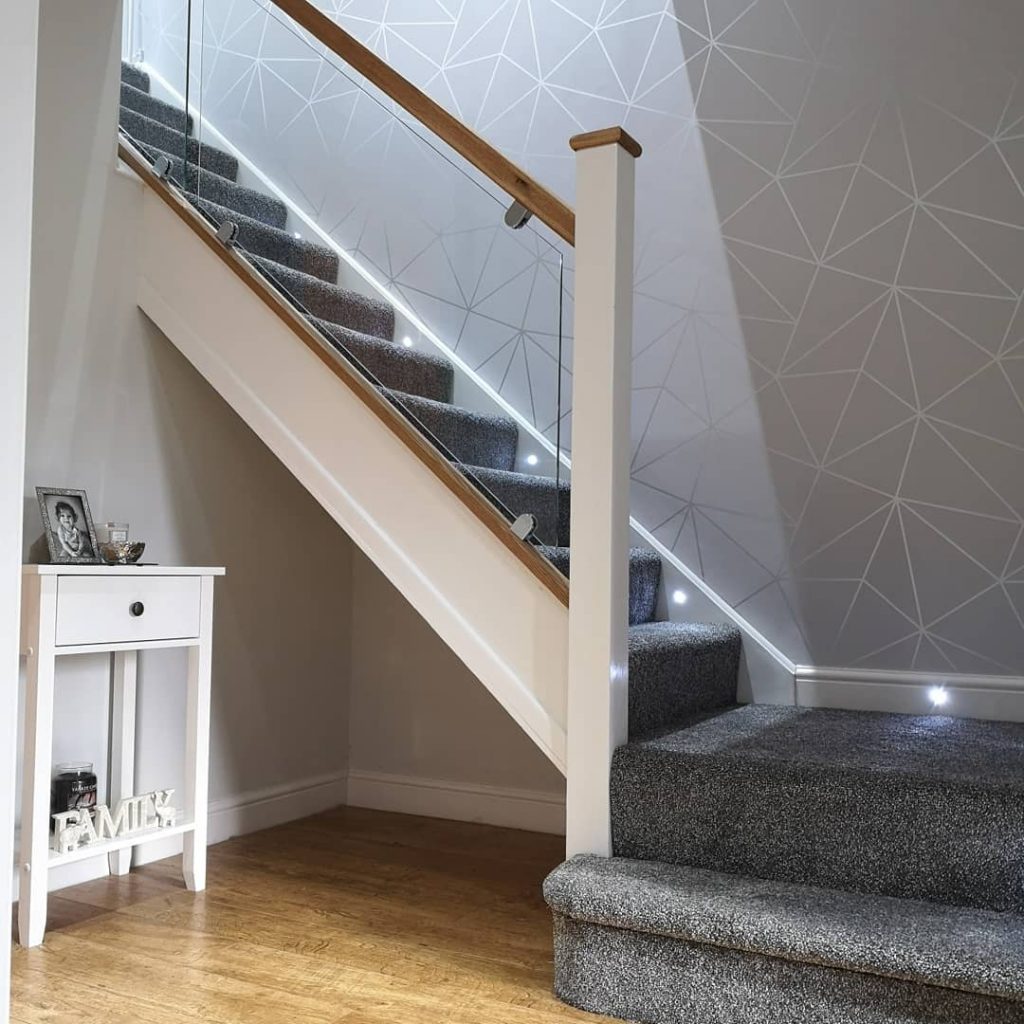
Standard angles
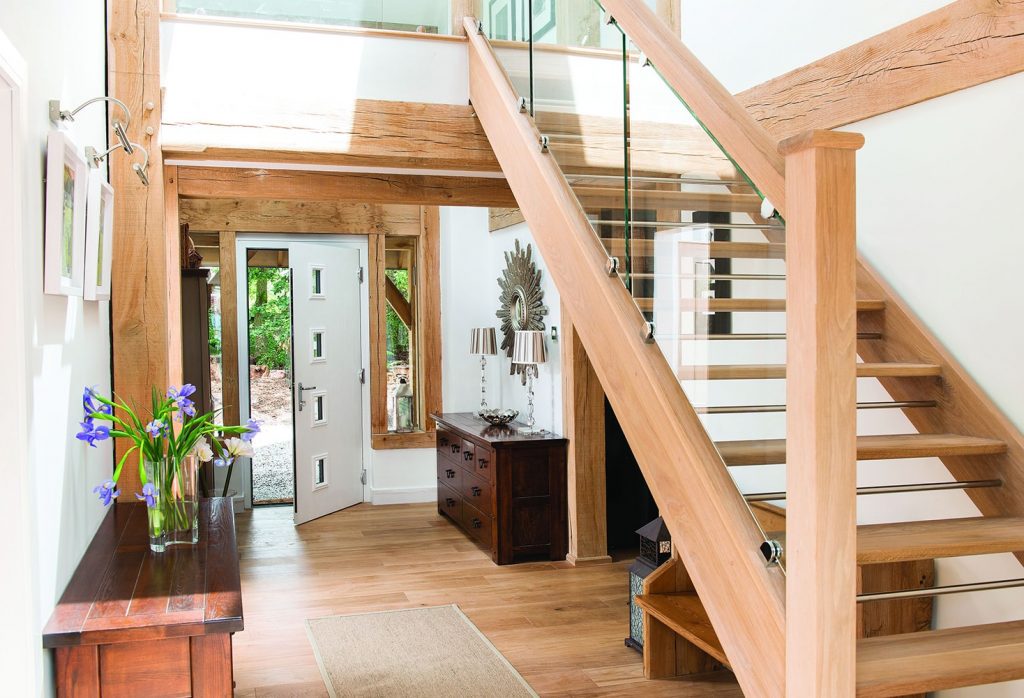
A bottom up photo can help make the most of any incoming light from a window, which can highlight the form of the staircase as well as capture the reflective properties of a glass balustrade. In this light, bright image, you get a real sense of the space around the stairs and how the flight has been designed to fit in perfectly.
Quirky angles
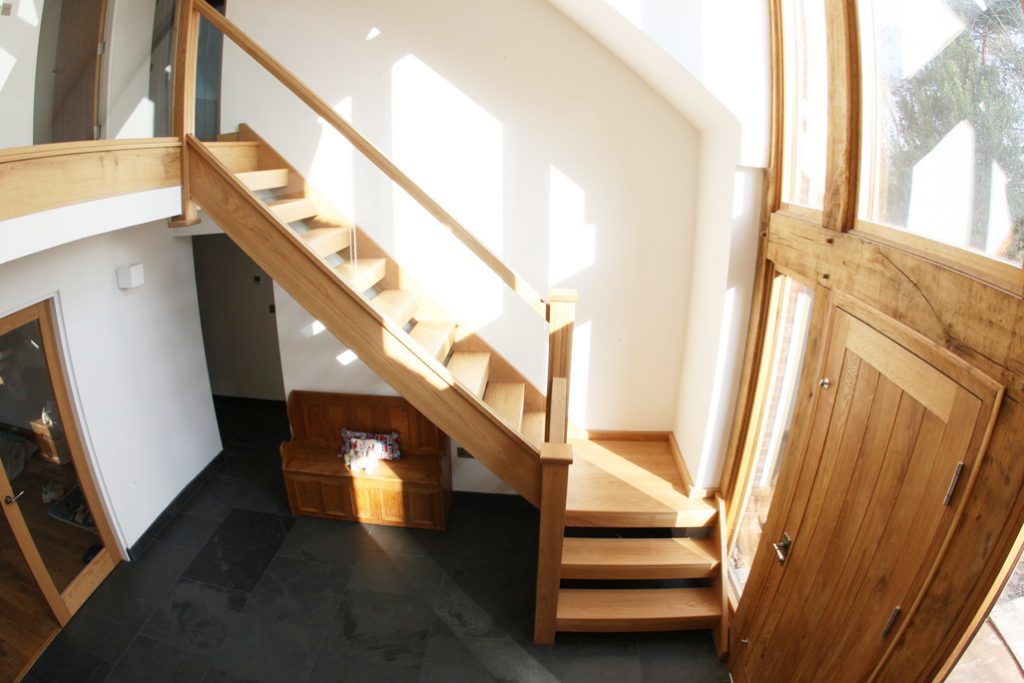
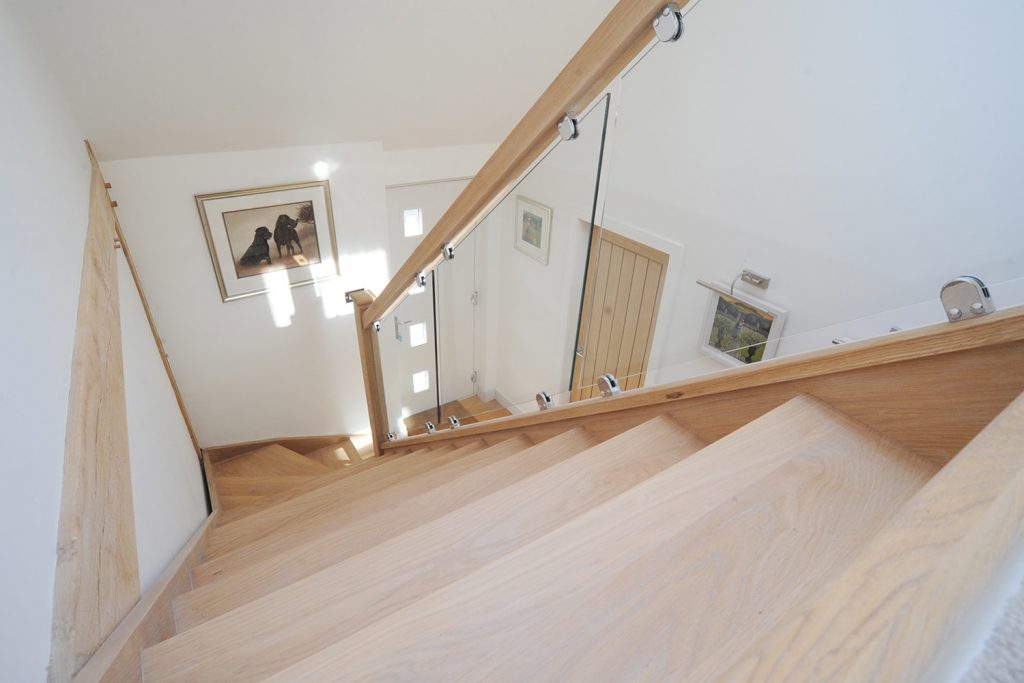
A top down photo can also work well, drawing the eye to details of the materials and joinery – elements which may well be missed when taking photos of the stairs from another angle. In this photo, the chrome clamps, beautiful timber grain and winder treads are all captured in the photograph.
Side view
A side on photo shows the interesting lines of the treads, risers and stringers, as well as any contrasts in material, like the painted timber and natural oak accents here. This image displays the craftsmanship that has gone into refurbishing this staircase – you’d never know it was a refurbished flight rather than brand new!
Inspired? Take your photos and send them to us!
We’re looking for images, like these, that show off the effect a new or refurbished staircase can have on your home. Whether you’ve had a complete oak and glass replacement staircase or have opted for something more subtle to refresh your existing stairs, we want to see it. When done well, even the simplest design can have an impressive impact.
Please email your photos to photos@stairbox.com
We look forward to seeing them!


